The build
An attempt to divert the mind from gabo-related activities.
02 May 2010. Start day. A neat workspace. Before I start to cut out parts etc. Note the 'third hand' I purchased to assist. It is still sitting unused on the hobby table (my dinner table - bachelor lifestyles have benefits also)

Above: 02 May 2010. Cheap Chinese hobby knife folds under the 'pressure' of balsa wood.
Above: Same day. The first longerons are pinned and glued. Such a minor work but it resulted in a feeling of success that helped me continue on.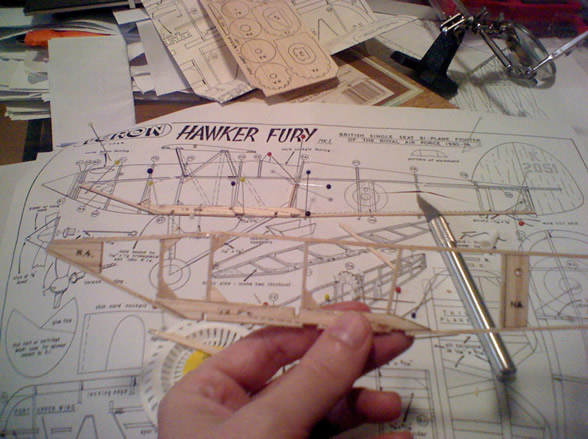
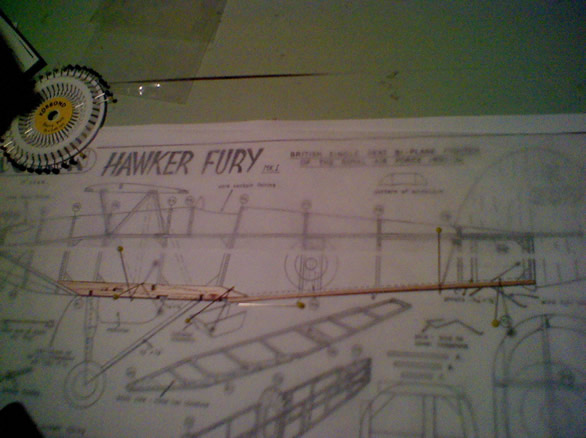
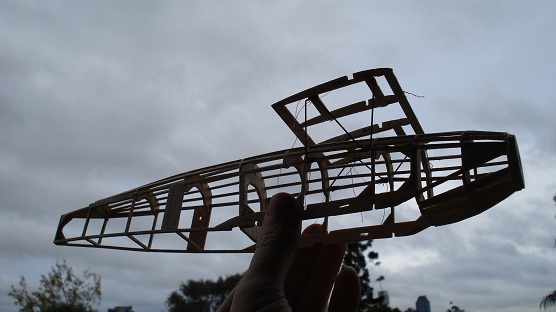
Above: 16th June 2010. The first side is finished and held in my hand, and the start of the second side you can see pinned to the cork tile supplied by dad. Plans were photocopies of the originals, which were too antique and in mint condition to stick pins through and pour glue on.
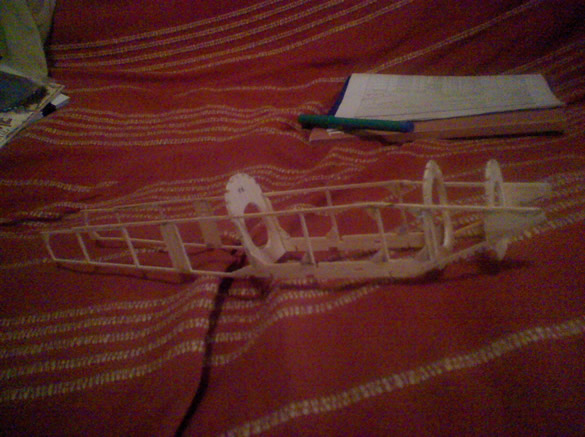
Above: 04 August 2010. Both sides built and joined by these two formers. Not in picture are 3 circulars I laminated together to make the nose piece that will pull the front of the fuselage together a little. The middle of the 3 formers snapped as I placed a little pressure on it, so I laminated a flat support to strengthen it.
Nosepiece done - had a bit of trouble, the former right behind it is cut vertically along the grain, so when I brought the front pieces together for the nosepiece it just snapped vertically. I glued a horizontal brace on it but it is slightly warped. The former behind it suffered the same fate.

Monday August 9 - Added two upper half formers - small job, but I am trying to do a bit every night. It has been three months since I started. If I apply this rate to my life I'll barely finish shaving by my 50th.

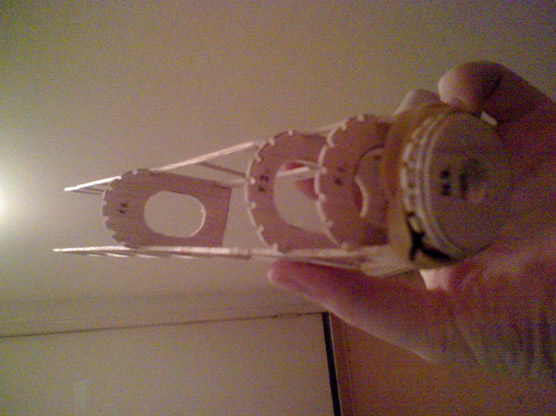
11th August 2010. Exhibition day holiday. Taking shape, literally. Two clothes pegs provide light enough pressure to not snap anything. The vertical grain in the formers is becoming an issue, they are snapping with only the lightest pressure being placed upon them. Note that I have also today removed the rubber bands off the front nose-piece. Here's a small close-up of the pegged rear-end:

18th August 2010. Tonight a 500GB hard drive in my RAID failed - which gave me time to do non-computer activities, as the RAID rebuild of a 1TB array takes around 20 hours. So after dinner at my parents (pre-birthday for dad) I started on the slightly intimidating centre section (below). Turned out to be simpler than it looked. There is some wire bending to do, and note the loss of another rubbish Chinese hobby knife - plastic cores cannot handle cutting 1/16 by 3/16 balsa...
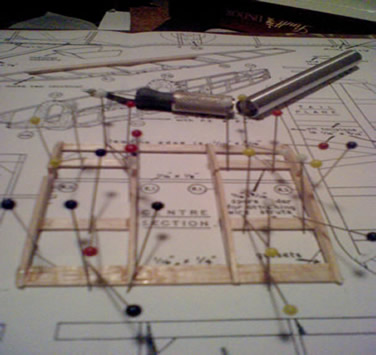
07 September 2010. The last fortnight I have built three of the four wings, and awaited delivery of a Du Bro wirebender (red tool in pic below) to handle the centre section support struts and undercarriage. The bender arrived on the weekend and I cannot praise it enough. Makes bending complex shapes a breeze, and it's such a simple design. After I complete the last of the four wings I will then bind the wire to the centre section and fuselage. In this picture below I've just temporarily plugged the wings in, but there's covering work to be done before I do this finally.

10 October 2010. This picture is a couple of weeks old. The longerons have been added along the top of the fuselage, only after the centre section was (painfully) added. It is presently just bound with cotton - eventually I have to commit and glue it in place, with balsa struts attached. Now (27/10/10) I am up to the tissue covering step, one I am putting off until I read a little more.
10 November 2010. Okay, I haven't a pic just yet, but I've been tissuing, with more success than I expected! Tailplane-entirely covered. All wings - covered underneath. Tailskid - added. Undercarriage-added. I could probably finish the beast with a push this weekend.

01 December 2010. Well, perhaps those who are digital camera prodigys will be able to tell that I now have an Android/HTC Desire. So hopefully better pictures. At least I can get them from my phone to the PC easily. Although I still persist in old tech paradigms - take photo, copy to hard drive, move to another folder, use FTP app to push to web. When I could push to web straight from the 'phone. That's my next project. Re the Fury - Well you can see it's covered. Wings are not in place, I have yet to trim some spars hence one wing does not sit well in this image. Used PVC wood glue and water, 50:50, to attach tissue paper. I have to be careful about the order I take - must insert rubber engine before I cover certain parts. Plus, this baby habit removes me from the ability to work on this plane. Well over eight months has drifted by on a job I should be able to do in a fortnight. I thought no kids would mean lots of time to live, but that was a flawed assumption.
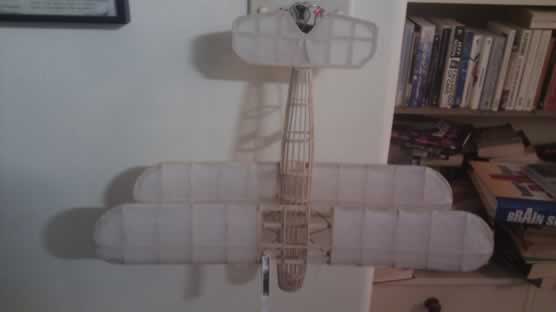
16 January 2011. Flood helped me progress a bit. Attached wings over Christmas time off, was a painstaking process as ensuring dihedrals and perpendiculars was slow. This week I've re-threaded the central wire supports, but haven't added the balsa wing-tip struts - they're the bits that'll give it the final, hopefully correct, positioning. Strutted tailplane today, tissued top wing centre-section and part of rear plane. Figuring out nose/prop setup at present. Have to say I am happy with current progress.